
Setting up a home sound studio may seem like a daunting task, especially from a technical point of view. However, your home sound studio should achieve one ultimate aim.
The goal is to produce appropriately loud, clean and noise free, high-quality vocal recordings, with no sound reflections. In this regard, recording technology today is not only more accessible than ever before, but it’s also more portable. Many great music productions often come from producers who work from the comfort of their house recording studio.
The first point to note is that you should start from a simple home sound studio. This path includes not splashing scarce resources on expensive equipment and tools, where more affordable versions exist. A simple start ensures that you do not experience the following:
- Getting overwhelmed
- Getting discouraged
- Giving up on your dream.
The Essentials For A Simple Home Sound Studio Set-Up

Experts point to several main components that should be on any beginner’s home recording studio list. These are the essentials needed to make sound quality recordings at home. The good news is that you can start with two or more of them and grow from there, especially as you hone your skills. Depending on your set objectives, the following items are among the most basic requirements for your studio:
- A computer, or sometimes a tablet or smartphone
- An audio interface (Also referred to as an external sound card).
- Microphones
- A MIDI controller
- Recording software or DAW (Digital Audio Workstation)
- Headphones
- Studio monitors
- Audio Cables and Stands.
- Ear Training Software.
So a little bit more detail of each of these items will suffice at this point:
1. A Computer
A computer system will serve as the central hub for your music recording craft. Many entrants in the recording business may fret over the kind of computer to use. However, experts advise starting with whatever system you have. It may be necessary to purchase enabling software and related kits. These kits( or peripheral gear) will allow you to work on multiple platforms.
However, new versions of laptops(purchased in the last 3 or 4 years) will prove adequate for recording, mixing, and sharing your audio tracks.
2. An Audio Interface

An audio interface is arguably the most critical piece of your home recording puzzle. This equipment gets your recordings INTO your computer and also connect to speakers or headphones so you can hear what you are producing.
3. Microphones
Microphones enable you to pass across sound into your laptop and audio interface. Three basic microphone options can suit your recording needs. They include:
- Microphones that connect directly to the external mic port on your computer.
- Microphones that record sound via an audio interface.
- USB microphones that work via the USB ports on your laptop.
You can choose one or more of these microphone options, depending on your unique recording needs.
4. MIDI Keyboard Controller

Your music production will eventually grow beyond making straight audio recordings via a microphone. To use virtual instruments (e.g., create drum, synth and bass tracks), create your sheet music, or learn to play keyboard, you will need a MIDI Keyboard Controller.
Before purchasing a MIDI Keyboard Controller, there are factors to consider. These factors range from the number of keys present to whether your controller should have additional faders or onboard sounds.
5. Recording software or DAW (Digital Audio Workstation)
The DAW (Digital Audio Workstation) is the software used to record, edit, and mix music on your computer. If your audio interface, USB Mic or MIDI Controller comes fitted with an entry-level DAW (Digital Audio Workstation Software), then you may not need to buy any other software immediately.
6. Headphones

You have inputted sound into your laptop via the audio interface. Your music production is not done until you can hear and assess the sounds you produced. You can only perform this task with the aid of good headphones.
For your home sound studio recording, there are two specific designs to choose from:
- Closed back headphones for tracking. This kind of headphones offers optimal isolation at the expense of lesser sound quality.
- Open back headphones for mixing. These headphones give you optimal sound quality at the cost of lesser isolation.
Experts advise the use of closed-back headphones in the early days of your home sound studio set-up.
7. Studio Monitors
Your home sound studio set-up will significantly benefit from the work of studio monitors. Studio monitors achieve a much flatter frequency response, which provides a more neutral, uncolored sound. This structured response better equips you to judge your mix objectively.
8. Audio Cables and stands
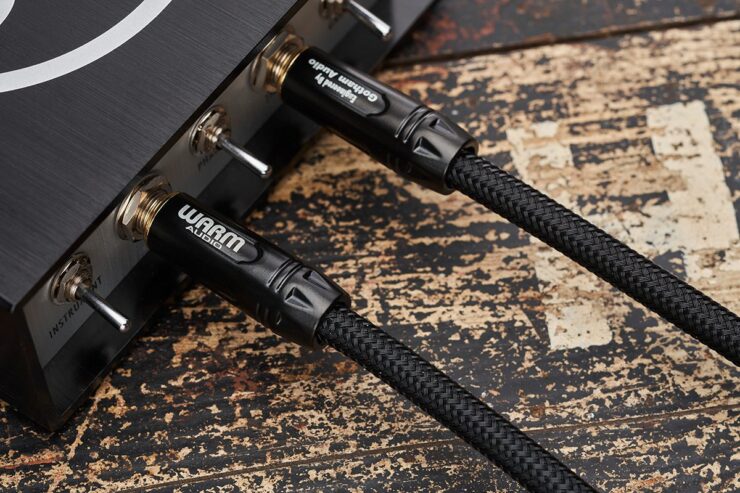
The necessary cables for your home studio set-up comprise the minimum essentials. They will include a mic cable, to connect your microphone to your audio interface (unless you have decided to choose a USB microphone). Your studio will also need cables to connect your audio interface to studio monitors.
A microphone stand represents one of the most substantial investments you will make in your studio. If you cannot go for a full standing boom stand, you can opt for a sturdy desktop stand, with the appropriate microphone.
9. Ear Training Software
An Ear Training software is essential because most or all of the music you produce will come from input from your Ears. Musicians learn to recognize notes, intervals, and chords. However, sound engineers learn to recognize bands of frequencies. Ear training software will your ears develop a basic grasp of the skill of knowing good sounding music.
10. SoundProofing

Your home studio should set-up in a way to eliminate outside noises such as people, traffic, weather, plumbing, computer fans, footsteps, and many other sounds. In some instances, even noise from planes.
At the most basic, the walls of your home studio should come padded/soundproofed. You can achieve this objective via the following means:
- Adding Mass: This process ensures your walls let as little noise in.
- Damping: Your walls dissipate kinetic energy from sound waves
- Decoupling: This process obstructs the transfer between contact points of objects. For instance, if you have a microphone stand that is wall mounted, you could fix a rubber seal between the mic stand and the wall.
- Filling Air Gaps: You can ensure there are no holes or gaps that introduce outside noise.